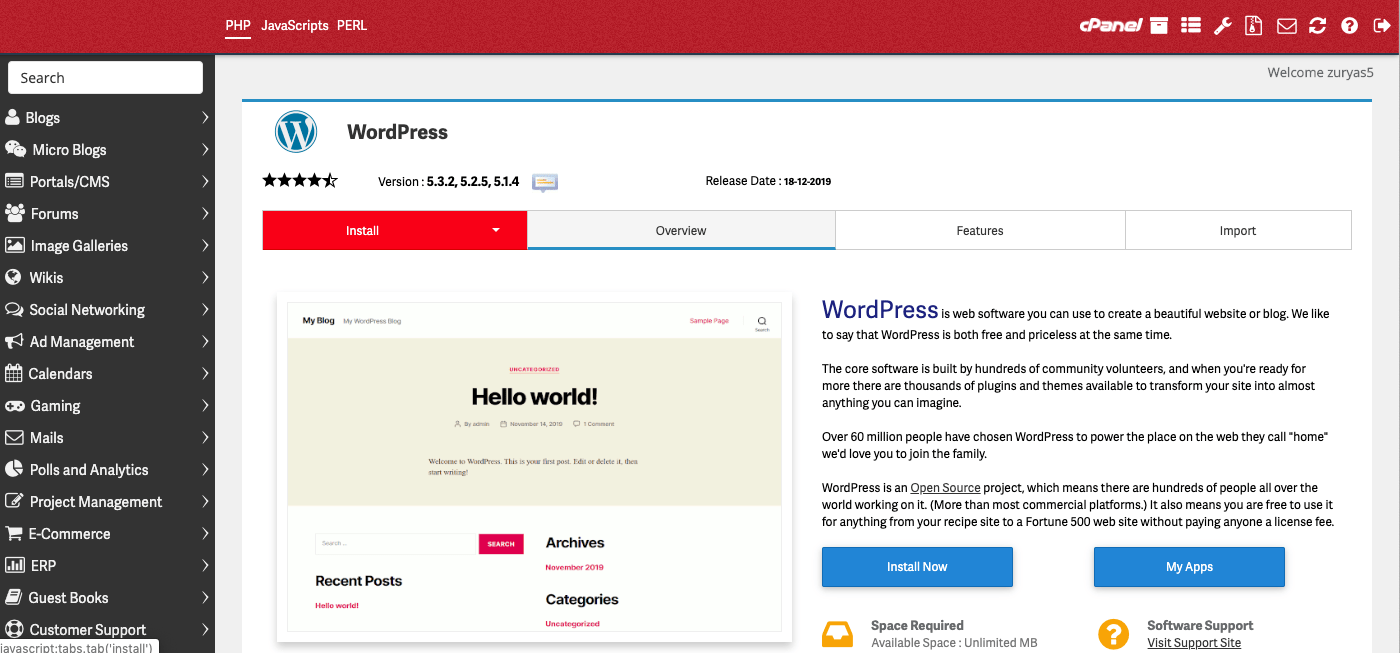
1. Install WordPress 5.x
It should be easy from your hosting account control panel. It should be something similar though not exactly the same as the one you see here below.
Ask your hosting provider if you need assistance.

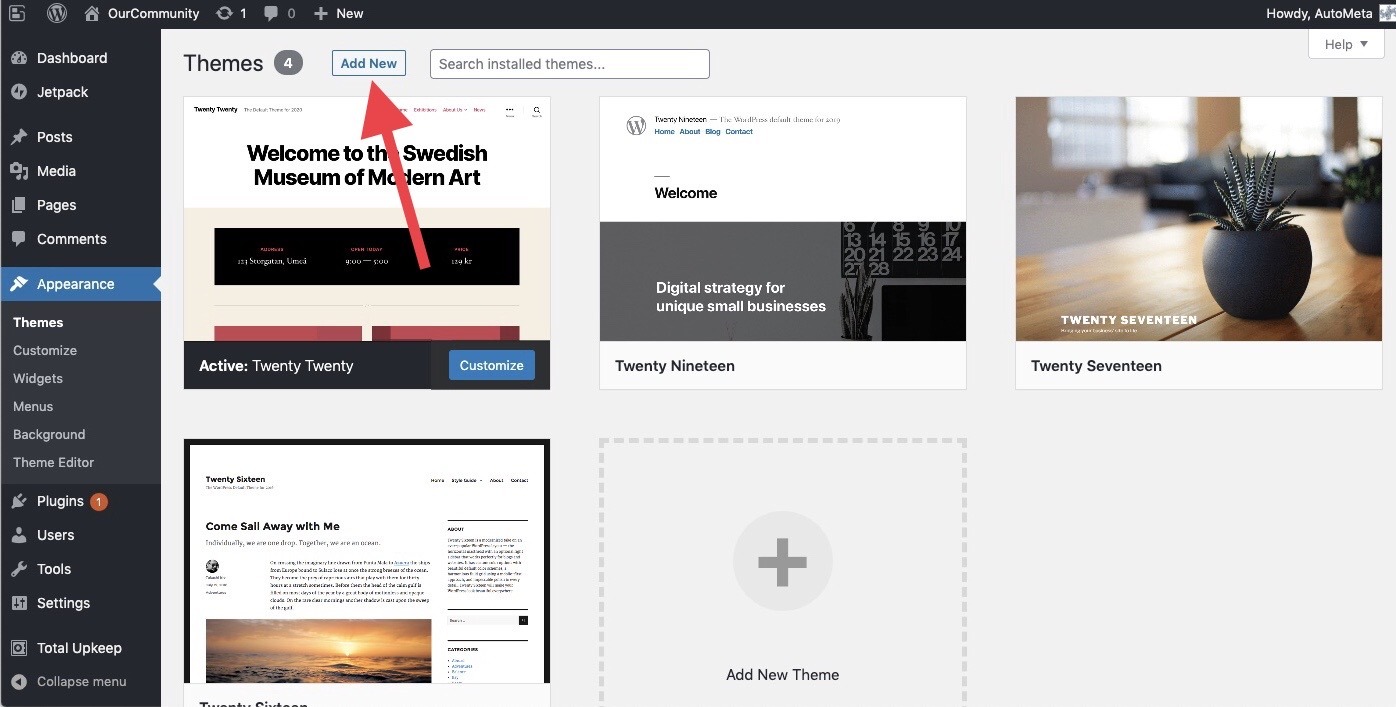
2. Install Autogov Theme
In your WordPress Dashboard Menu go to:
Appearance-> Themes-> Upload Theme-> autogov.zip
(that is the file you got from the Downloads page)

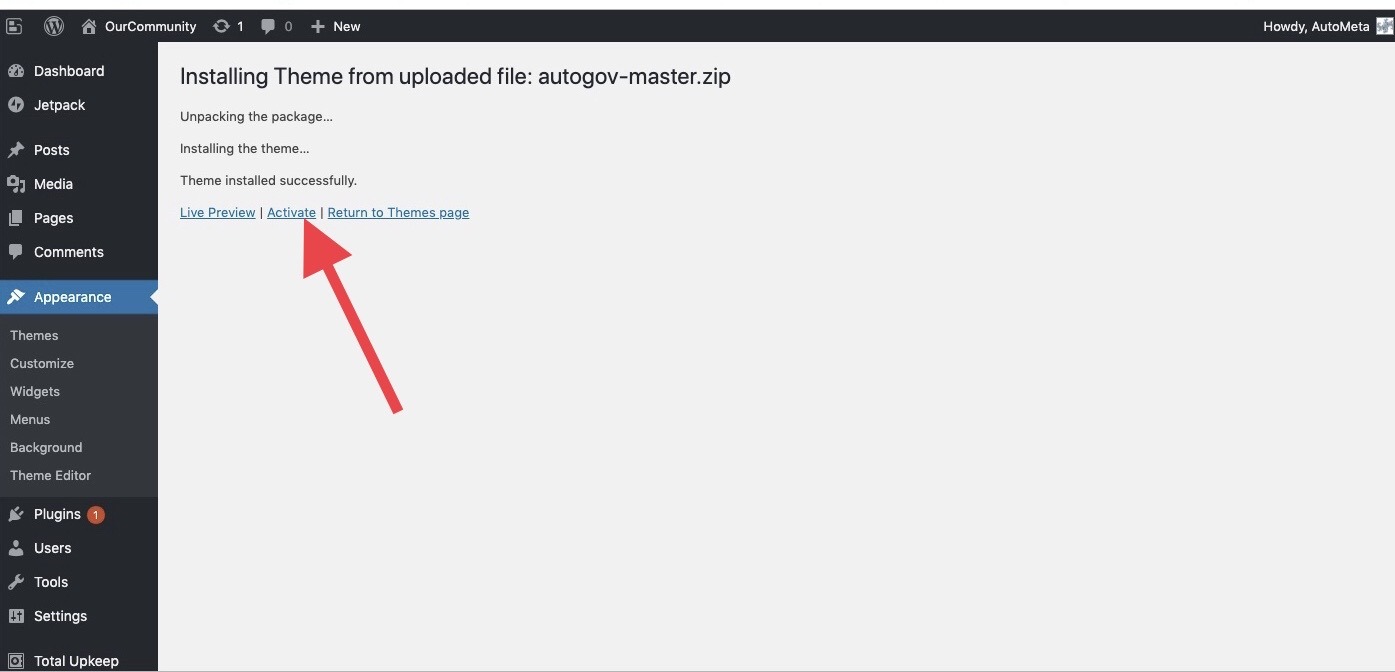
3. Activate the Theme.
Click on Activate.
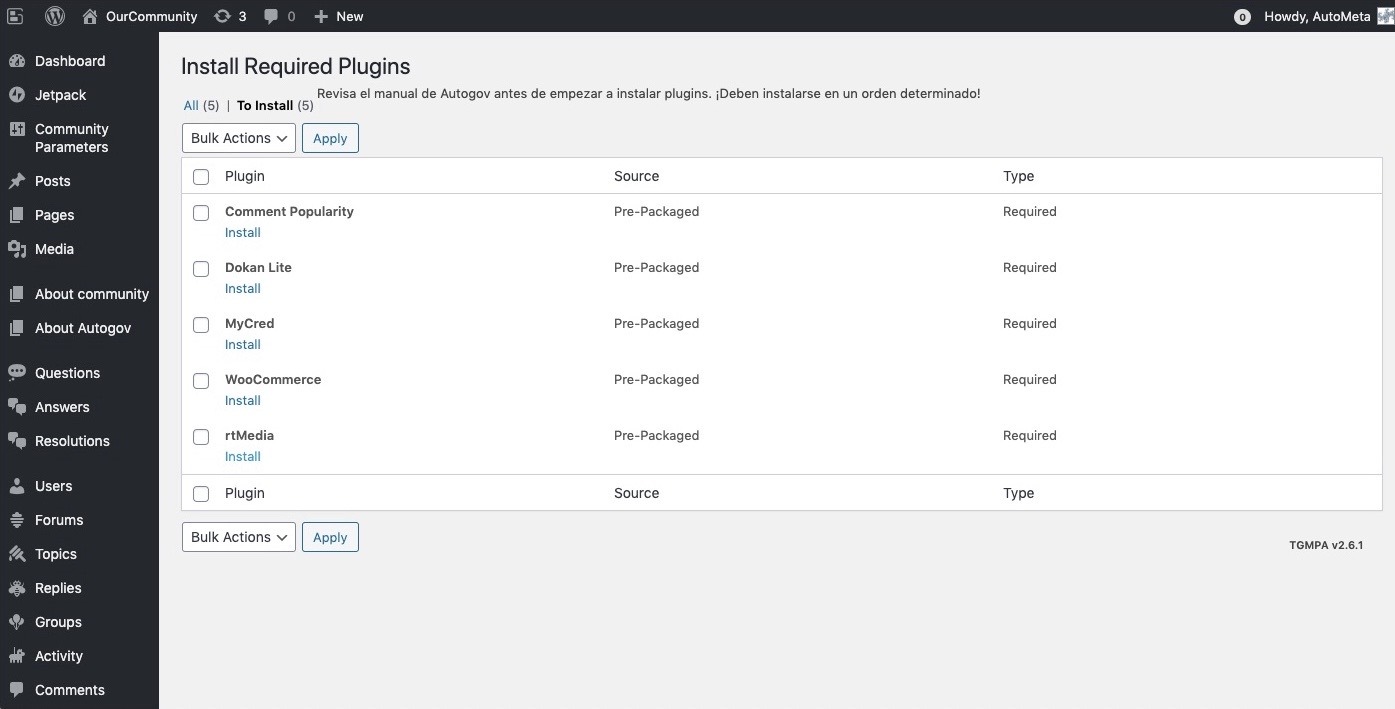
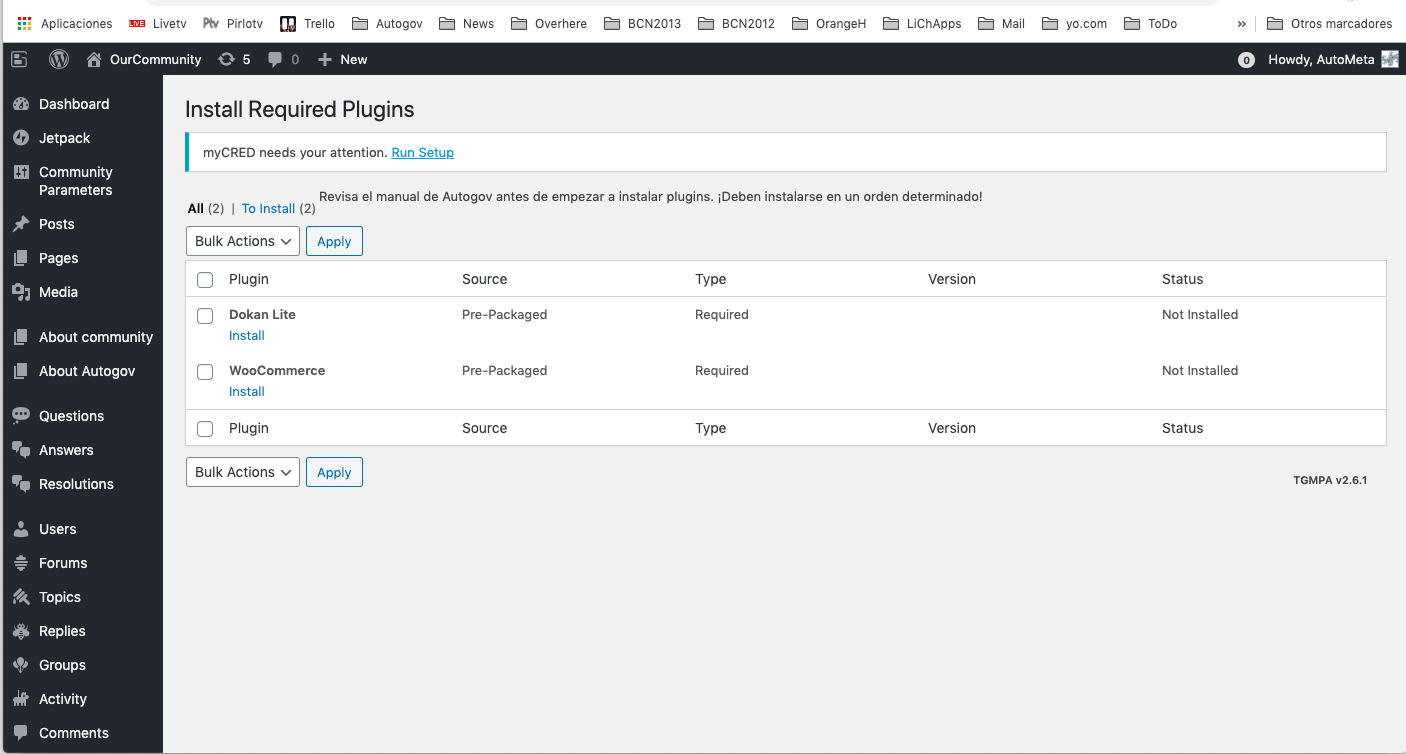
A message appears: This theme requires the following plugins BBPress, BuddyPress, Comment Popularity, Dokan Lite, MyCred, WooCommerce and rtMedia. Begin installing plugins.
Click on begin.
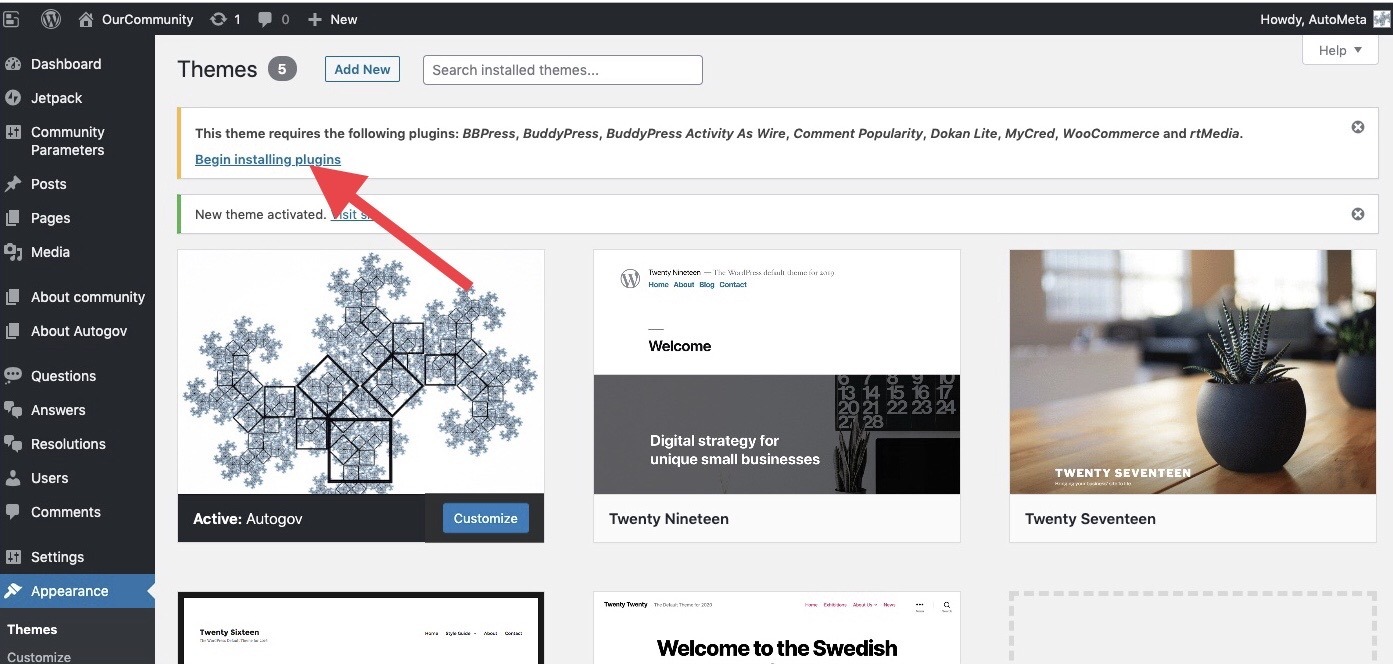
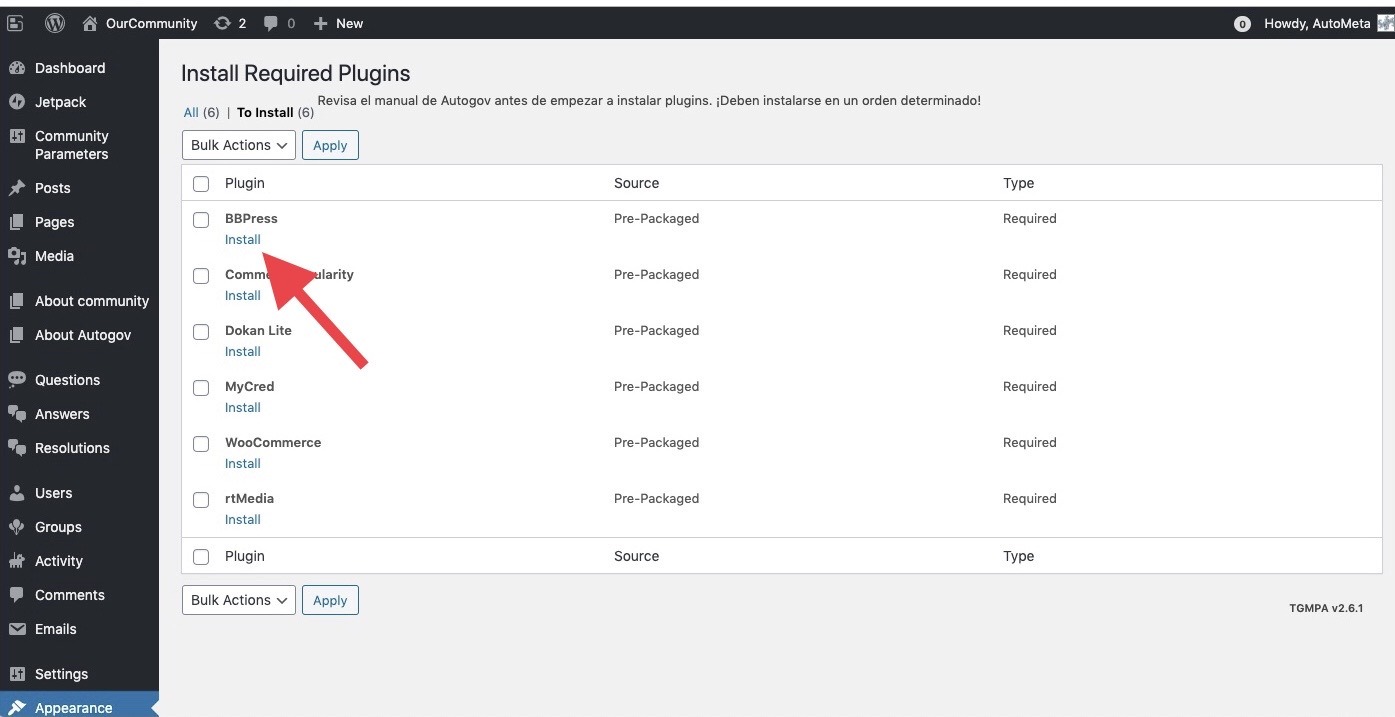
The Installation and configuration of all needed plugins begin. They are automatically activated and cannot be disabled while the theme is activated. They should always be installed from this Begin installing plugins link.
4. Install Buddypress
After install click on Return to Begin Installing plugins and choose “Install BuddyPress as Wire”.
Configure Buddypress:
In your WordPress Dashboard, go to:
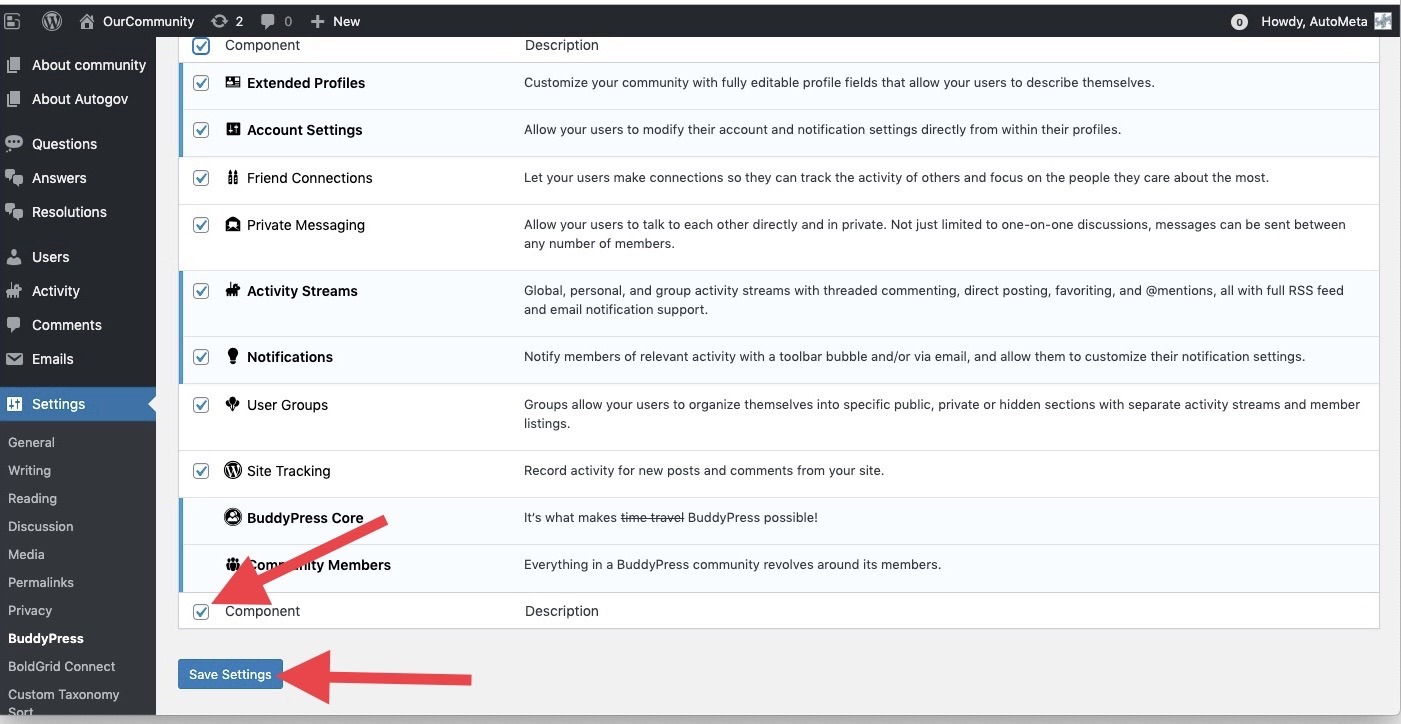
Settings-> Buddypress tab
Components, mark all and Save.
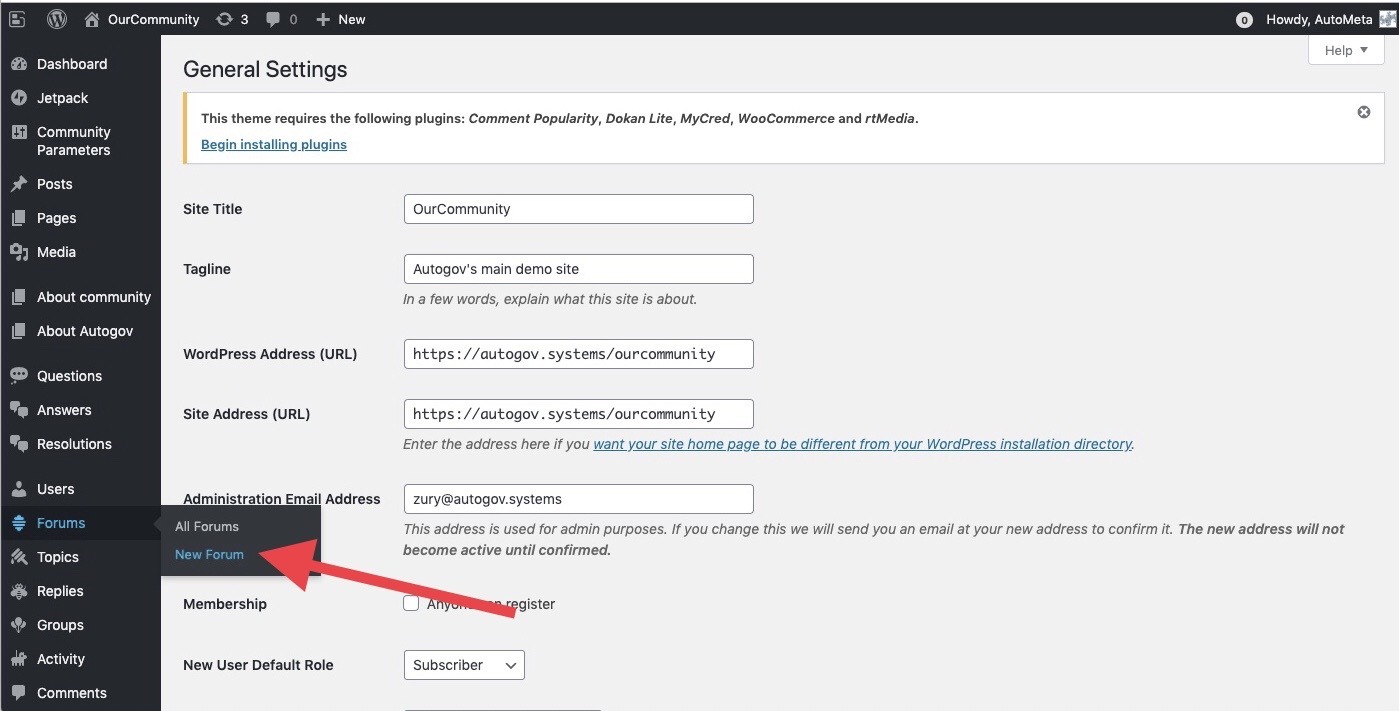
5. Install BBPress
After installing we need to
Configure BBPress:
Integrate BBPress with Buddypress group forums by:
In your WP Dashboard menu go to
Forums-> New forum. Name it as ‘Group Forums’ and type ‘Category’ and Publish it. Then go back to Required Plugins Installer
6. Install RTMEDIA
Simpy install the plugin with its default configuration and go back to Required Plugins Installer
7. Install COMMENT POPULARITY
Simpy install the plugin with its default configuration and go back to Required Plugins Installer
8. Install MYCRED
After installing we need to
Configure MyCRED:
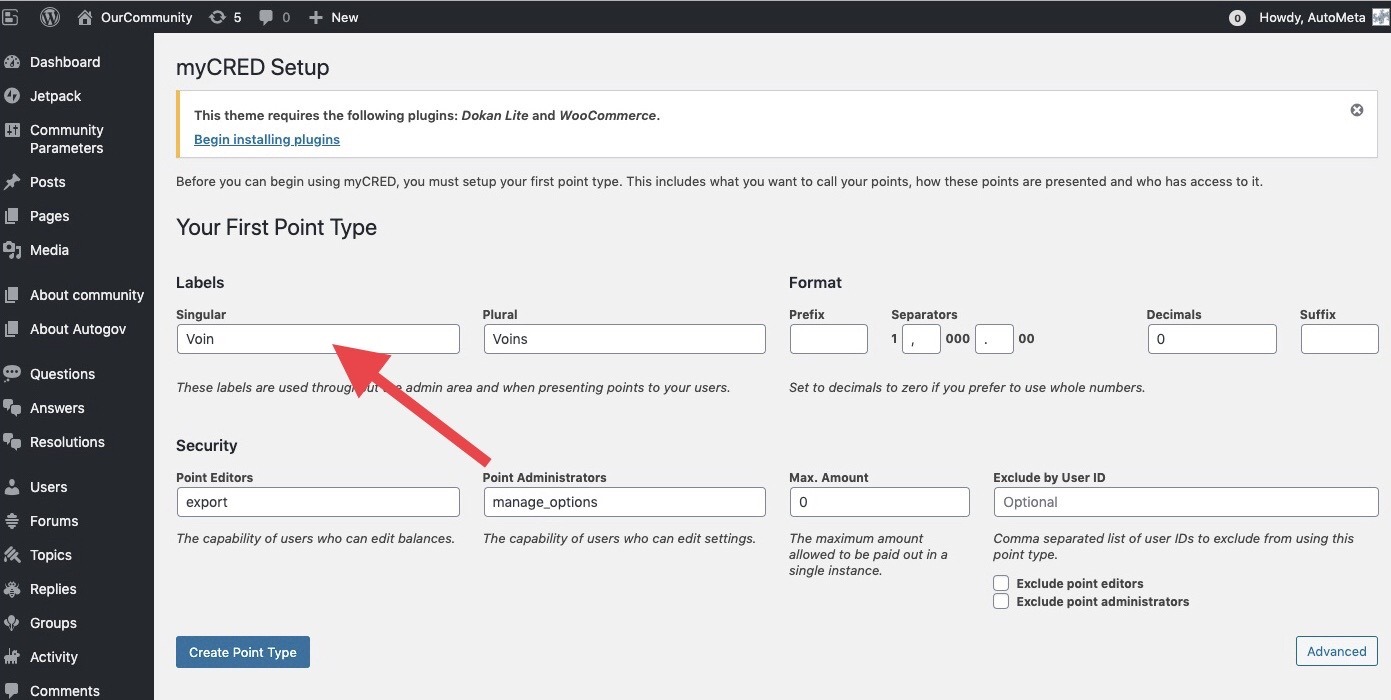
1. When we return to the WordPress Dashboard we will have a message like this: ‘myCRED needs your attention. Run Setup ‘.
Click on Run setup:
2. We create the first type of point, or Virtual Currency. You can name it anyway you like, or if you want to use Autogov default virtual coin then name it Voin, in singular, and Voins, in plural. Then click on ‘Create type of point’.
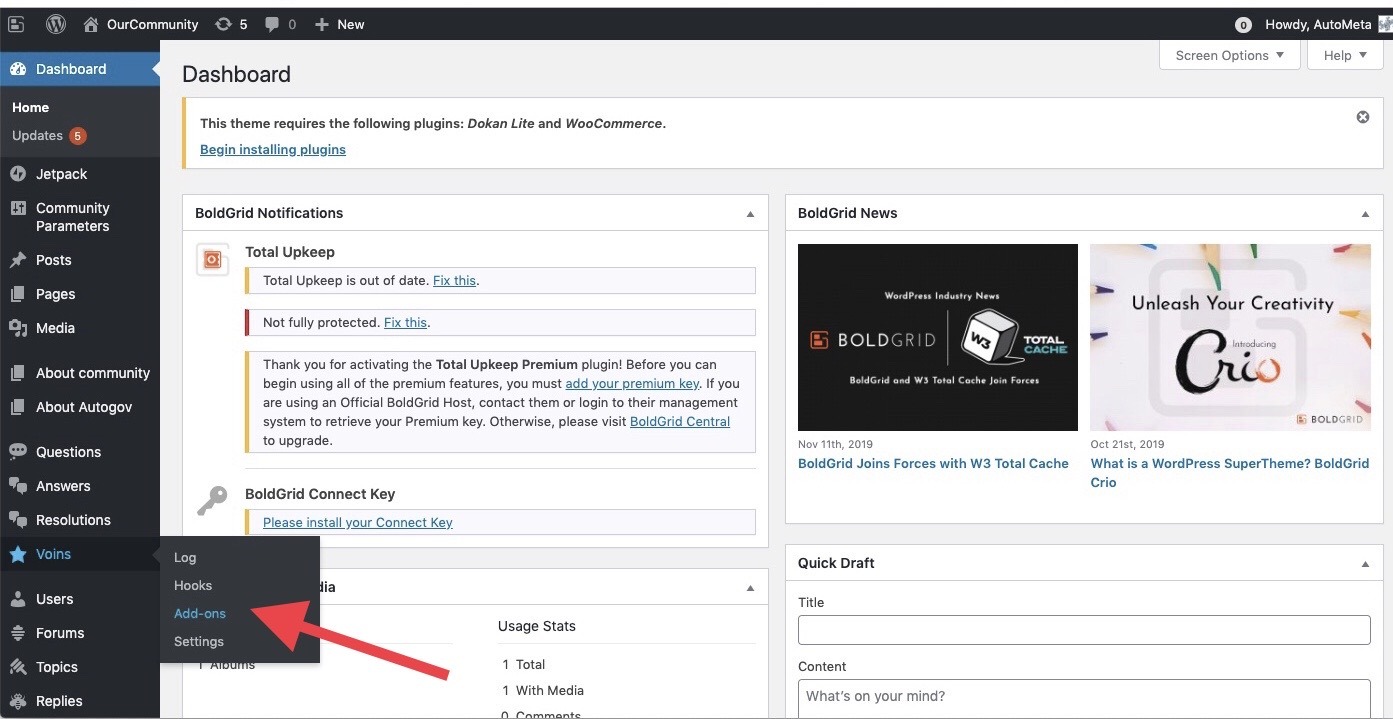
3. After doing this, in the WP Dashboard we will have a new item with the name of Voins (or the name you chose)(You may need to reload the page if you don’t see it). We will go to Voins → Addons:
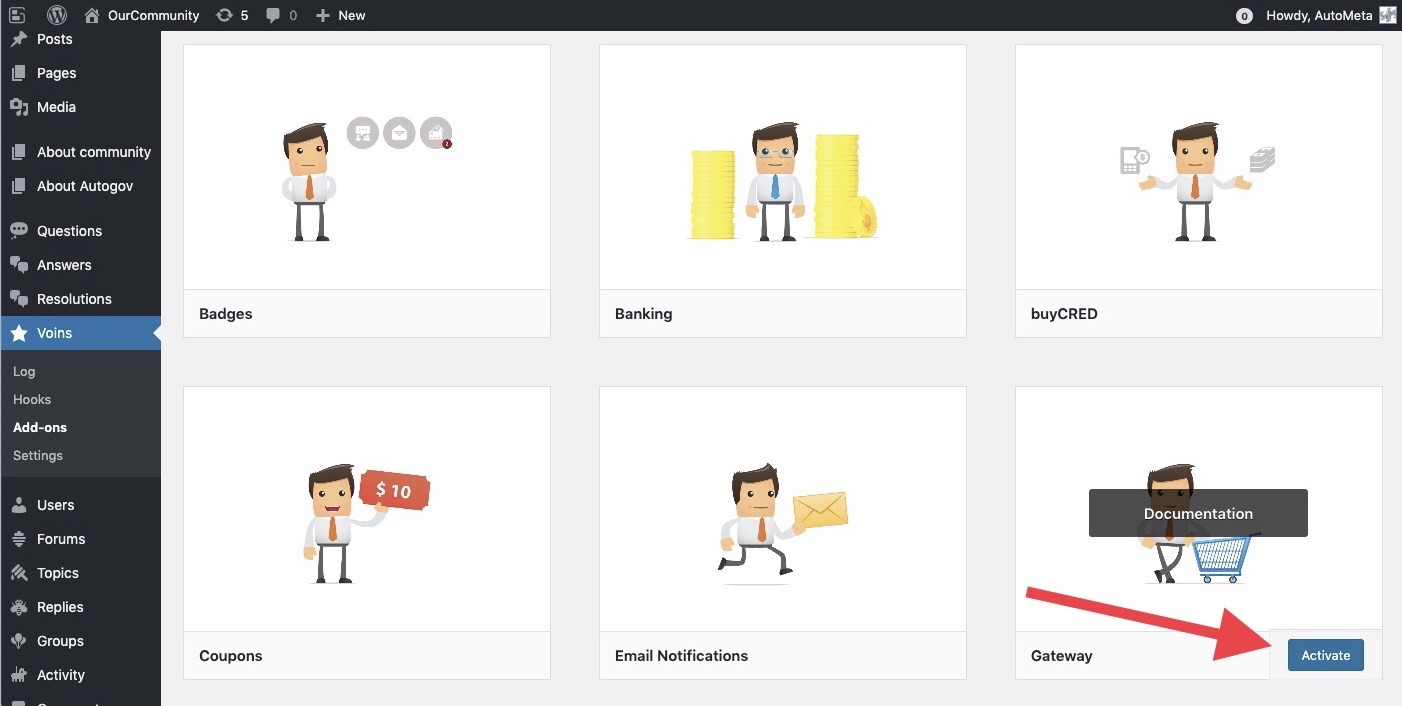
4. In this Addons / Extensions screen we will activate Banking and Gateway:
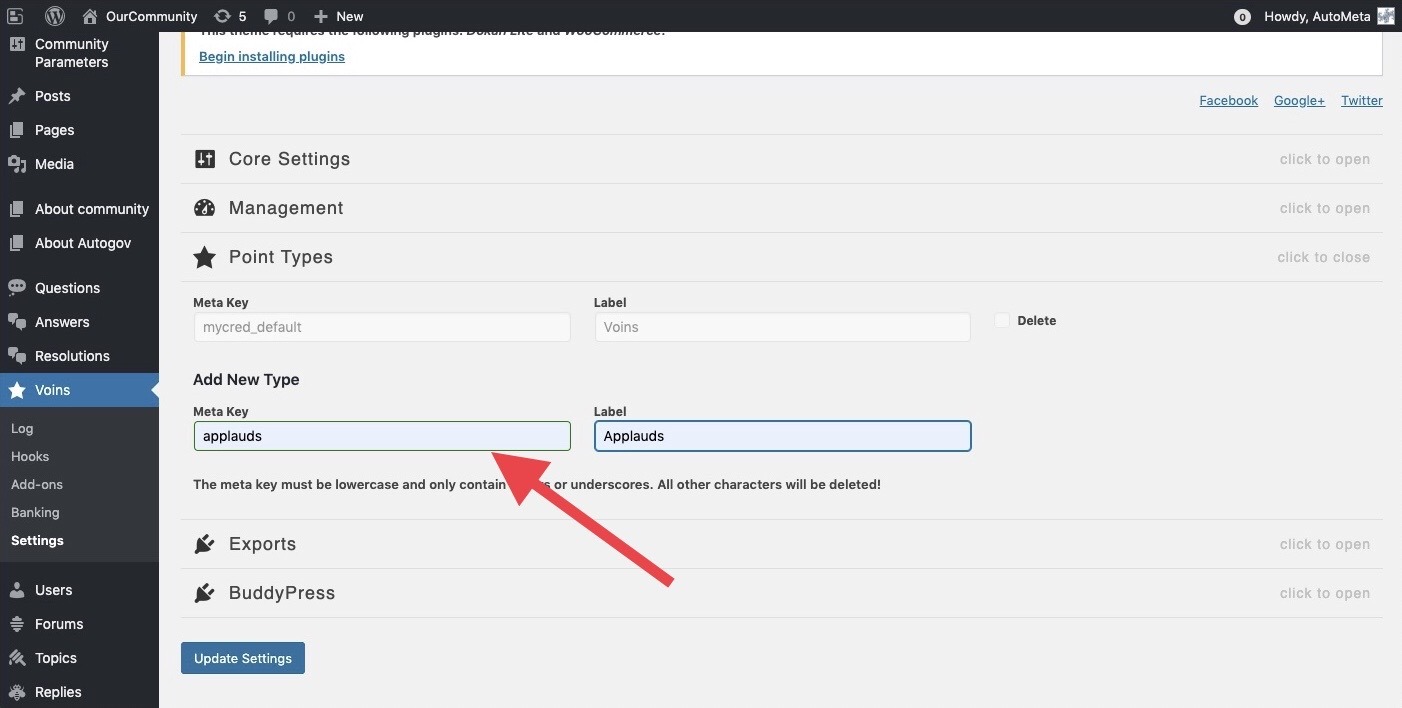
5. Finally we create another type of point, for our Social Currency and The Game: Applauds. We go to Voins-> Settings, and in Point Types-> Add new type we write ‘applauds’ as Meta key and ‘Applauds’ as Tag. Then click on Update Settings.
9. Install Woocommerce
After installing, click on your Dashboard button to begin
WooComerce Cofiguration:
Woocommerce configuration has several steps:
1. Store configuration: Fill it in with your local data. We will configure the use of Voins later on. Click on “Let’s Go”

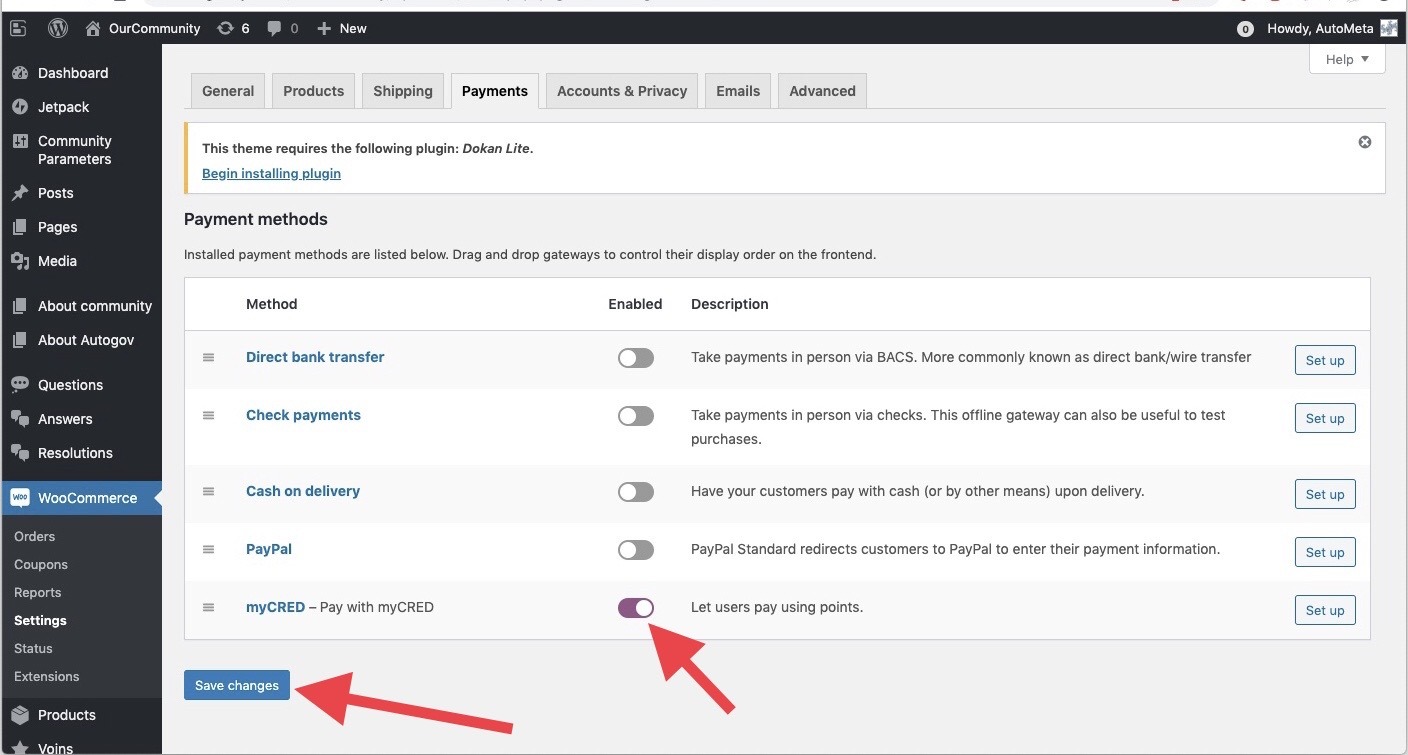
2. Payment: If you want to use Voins or your Virtual Currency then deselect all payment methods; later in this tutorial we will set up the payment with Voins. Otherwise select those you want to support. Click “Continue”

3. Shipment: We will deselect everything for now. Later on you may configure this according to your community’s needs. Click Continue.

4. Recommended: Uncheck everything for now. Click Continue.
5. Activate: In this screen we suggest using Jetpack, but we will not do so now, you may configure it later if you wish, so click on ‘Skip this step’:
6. Ready!: On this screen we click the button Visit Dashboard

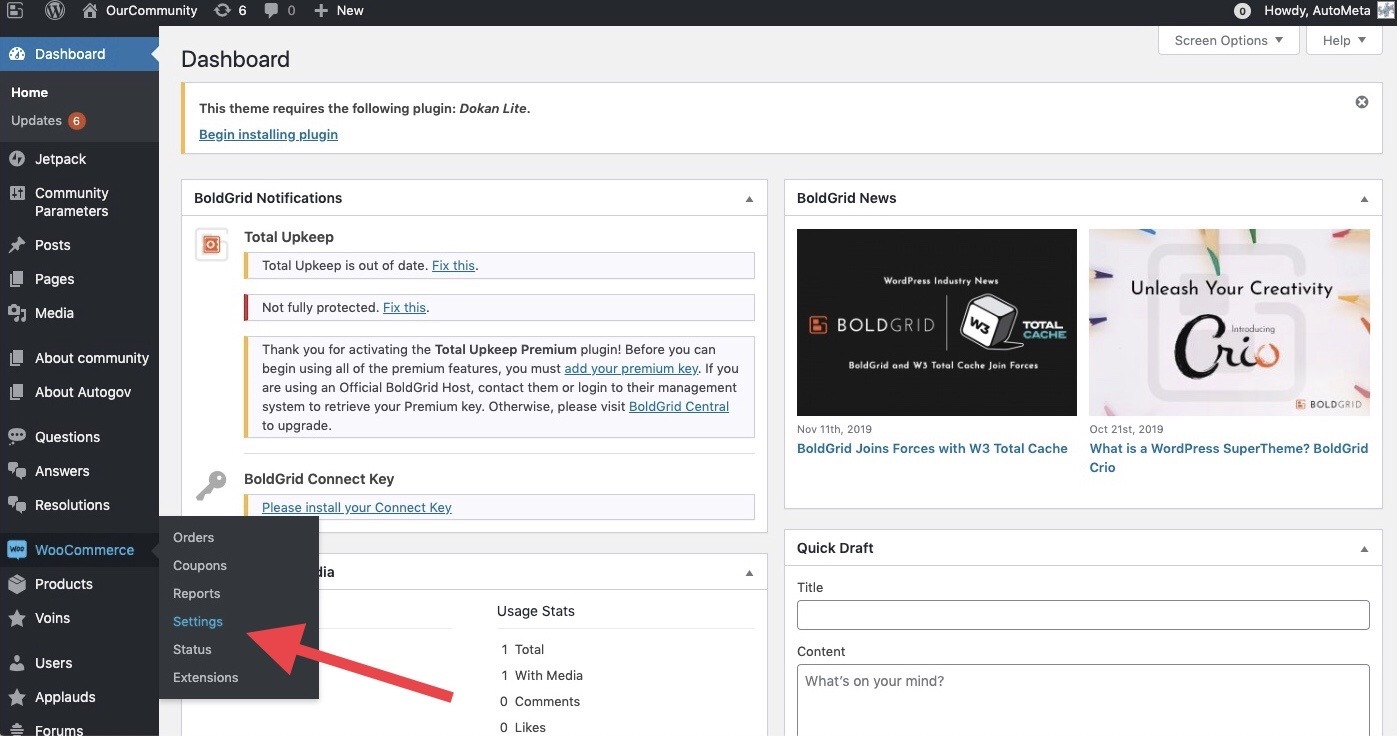
7. Now we activate Voins payment: On the WP Dashboard we go to WooCommerce-> Settings, and in the ‘Payments’ tab we activate the option of ‘MyCRED-Pay with MyCRED’. Then just click on ‘Save changes’ and then again on ‘Begin Installing plugins’
10. Install DOKAN LITE
Simpy install the plugin with its default configuration
If at any time this screen appears:
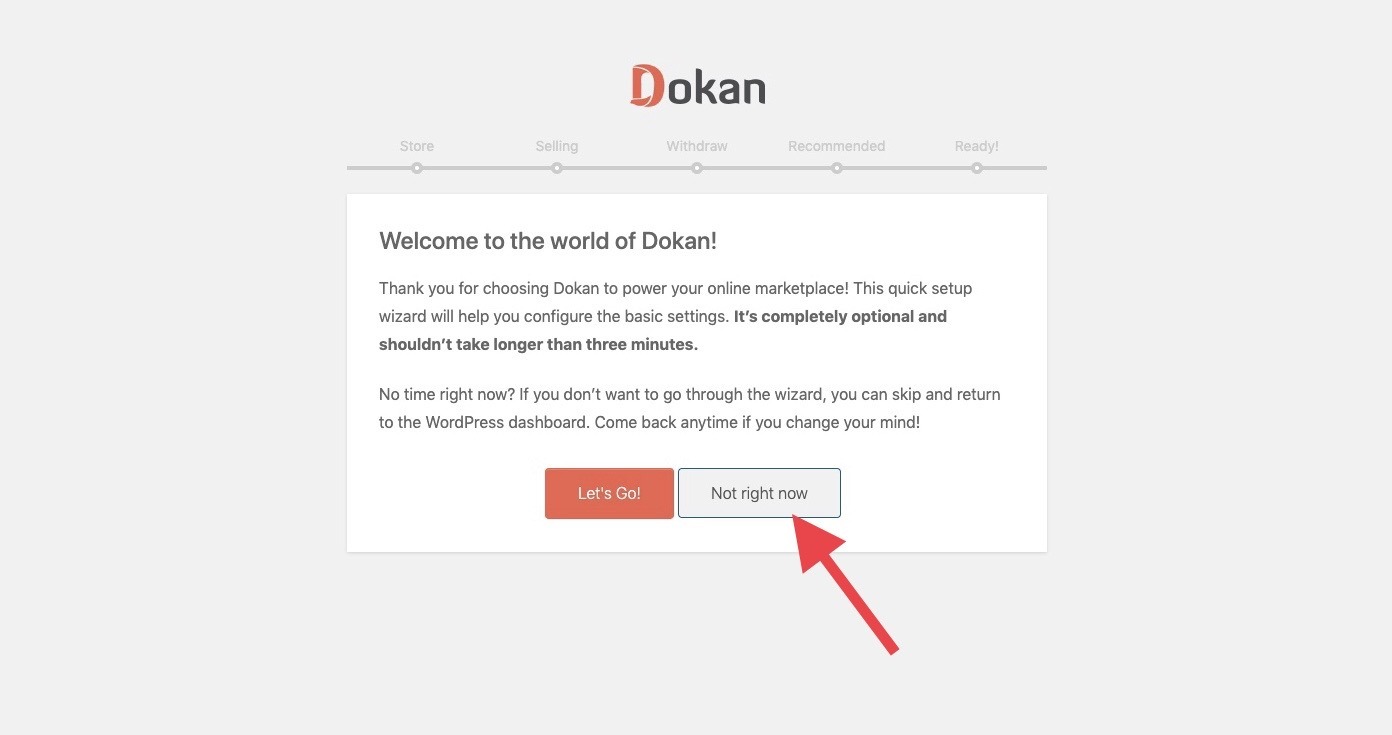
Simply close it by clicking on ‘Not right now’:
That’s it, congratulations! You have finished installing your Communities Autogov.
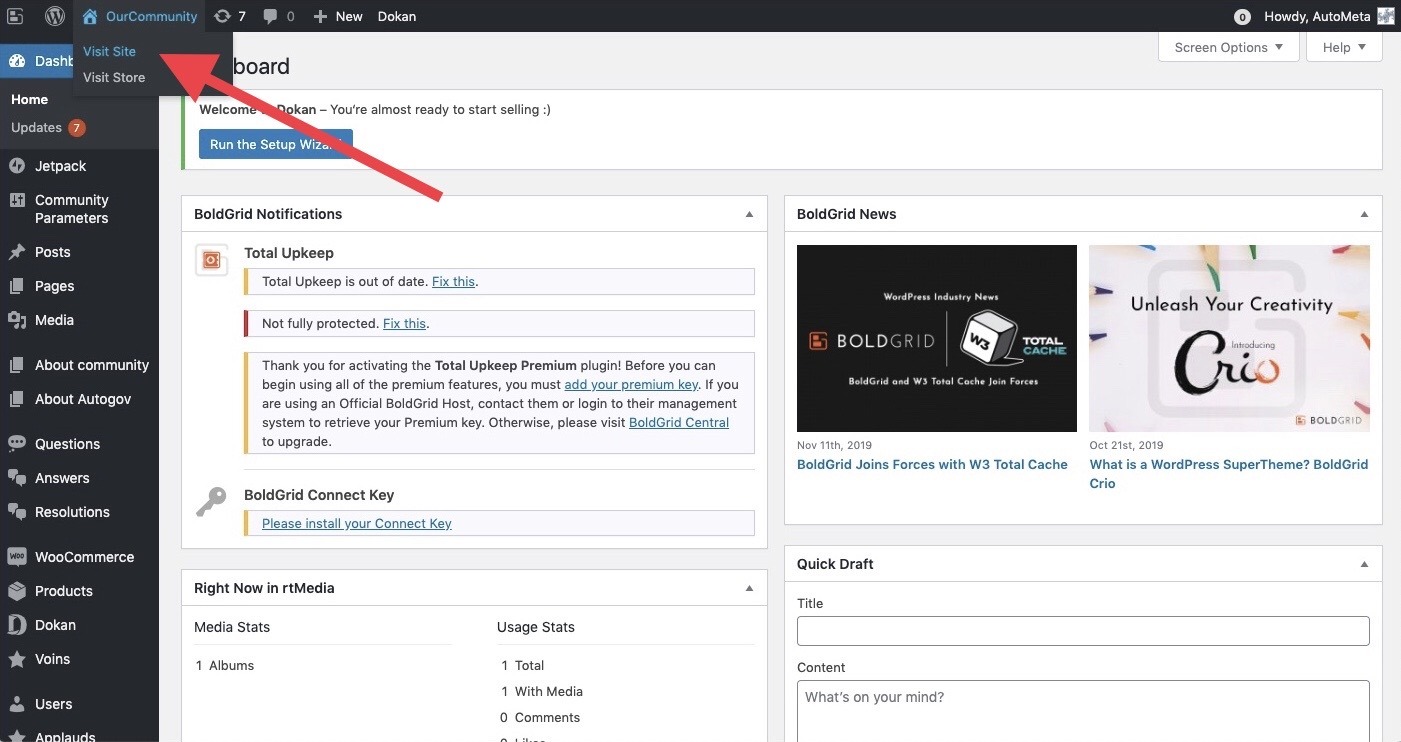
We still need to configure it and add some content, but if you wish you may visit your new Autogov site now:
Go to Configuration Manual